How to Iron a Utility Kilt: Tips for Crisp and Clean Results
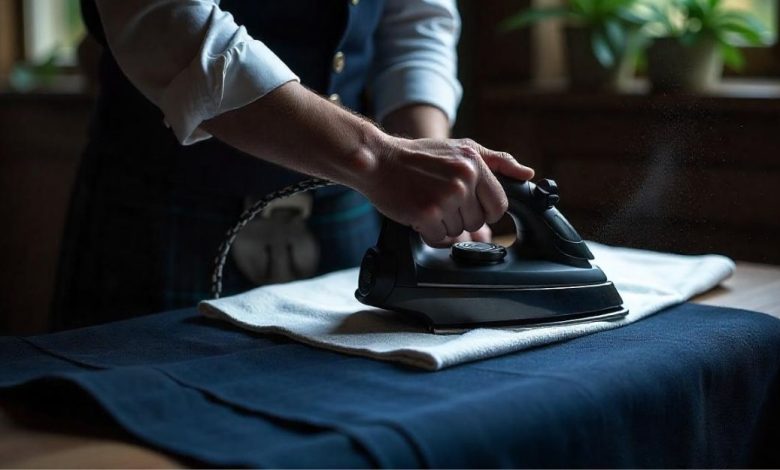
Ironing a utility kilt may seem daunting but it is a straightforward process. It can keep this versatile garment looking sharp. To achieve the best results one should iron a utility kilt inside out on a low heat setting. Use steam for any stubborn wrinkles. It protects fabric and ensures the pleats maintain their structure.
It’s essential to pay attention to the material when ironing, as different fabrics may require specific settings. Cotton and polyester blends are common in utility kilts, both responding well to gentle heat. Taking the time to properly iron the kilt can enhance its appearance. It makes it suitable for various occasions.
Incorporating some simple tips can make the task even easier. Ensuring the kilt is slightly damp before ironing can aid in the removal of wrinkles. Using a pressing cloth can prevent shine on darker fabrics. With these techniques anyone can master the art of ironing a utility kilt effectively. kilts for men near me
Understanding Utility Kilts
Utility kilts combine functionality and style, making them a versatile choice for various settings. Their unique design features and adaptability contribute to their appeal.
Distinctive Features of Utility Kilts
Utility kilts stand out due to their blend of traditional kilt elements and modern practicality. Common features include:
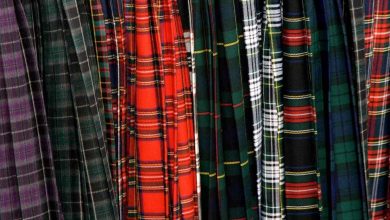
- Material: Made from durable fabrics like cotton or polyester. These kilts often resist wrinkles and stains.
- Pockets: They typically have multiple pockets including cargo pockets. Designed for carrying tools or personal items.
- Adjustable Sizes: Many come with adjustable buckles or straps for a customizable fit.
- Versatile Lengths: Available in various lengths utility kilts allow for comfort and mobility.
These elements contribute to a rugged yet fashionable look. It appeals to those appreciate both heritage and modern convenience.
Appropriate Occasions for Wearing a Utility Kilt
Utility kilts serve well in a variety of situations. They are well-suited for:
- Work Environments: Many professionals in outdoor or manual labor fields choose utility kilts for their practicality.
- Casual Events: picnics, barbecues, and informal gatherings are ideal for a laid-back kilt appearance.
- Festivals: Cultural festivals or events celebrating Scottish heritage often see attendees wearing these versatile garments.
Worn with care, utility kilts can transition from practical daywear to stylish evening outfits, making them suitable for numerous occasions.
Preparation for Ironing
Preparing to iron a utility kilt requires gathering the right supplies, setting up an effective workspace, and inspecting the kilt for any needed attention. Each of these steps ensures a smooth and efficient ironing process.
Gathering Ironing Supplies
To start, one needs specific supplies to iron a utility kilt effectively. Essential items include:
- Iron: A steam iron is preferable for removing wrinkles.
- Ironing Board: Ensure it’s wide enough to accommodate the kilt.
- Spray Bottle: Fill it with water for additional steam if necessary.
- Pressing Cloth: A clean cotton cloth can protect the kilt fabric from direct heat.
- Fabric Starch: Optional, for crisp finishes.
It’s also wise to check the temperature settings on the iron before beginning. Different materials require varying heat levels. Understanding the fabric of the kilt—typically cotton or polyester—will aid in setting the appropriate temperature.
Setting Up the Ironing Area
Establishing a well-organized ironing area is critical for effective ironing. The ironing board should be placed in a flat. Open space away from walls and furniture to allow easy movement.
Ensure iron is plugged in and heated to correct temperature. Keep a towel to catch any drips and avoid water damage to surfaces. Setting up a stable light source will help in inspecting the fabric while ironing.
For safety, it’s important to ensure that area is free of clutter. This minimizes distractions and prevents accidents during the ironing process.
Pre-Ironing Kilt Inspection
Before ironing, a thorough inspection of the kilt is vital. Look for any stains, loose threads, or damage. Address stains with appropriate cleaning products before applying heat it can set stains permanently.
Examine the pleats and pockets to ensure they are clean. This step prevents any unwanted impressions on the fabric while ironing.
Check the seams for any fraying or defects. If found, it may be wise to repair these issues before proceeding. Ensuring the kilt is in good condition will facilitate a more effective and aesthetically pleasing ironing session.
Ironing Techniques for Utility Kilts
Ironing a utility kilt requires specific techniques to maintain its structure and fabric integrity. Proper care ensures that pleats remain crisp and the garment looks neat.
Straightening the Pleats
When ironing a utility kilt, it’s crucial to start with the pleats. Lay the kilt flat on an ironing board, ensuring the pleats align perfectly. Use a steam iron set to the appropriate temperature for the fabric.
- Starting at the top of the pleat, gently press down with the iron.
- Move downwards, applying light pressure to maintain the shape.
- Avoid excessive force, as this may flatten the pleats.
Repeat this process for each pleat, ensuring they are evenly styled. This method retains the kilt’s distinctive look while avoiding fabric damage.
Securing Straps and Buttons
Before ironing, ensure that all straps and buttons are secured. Unruly straps can become tangled or misshapen during the ironing process.
- Fasten all buckles and straps to prevent them from catching on the iron.
- Check for any decorative buttons or fasteners that may warp under heat.
If the straps are made from a heat-sensitive material, consider placing a lightweight cloth over them before starting. This additional layer protects them from direct heat damage.
Temperature Settings and Fabric Care
Setting the right temperature is essential when ironing a utility kilt. Different materials require specific heat levels to prevent scorching or melting.
- For cotton kilts a medium to high setting works well typically around 350°F (175°C).
- For polyester blends use a lower setting around 300°F (149°C).
Always check the care label for specific recommendations. If unsure, test the iron on a hidden seam first. Using steam can aid in removing wrinkles effectively, but ensure that the iron is at the proper distance to avoid any hot spots on the fabric.
Post-Ironing Care
Proper care after ironing a utility kilt is vital for maintaining its appearance and longevity. After completing the ironing process, there are specific steps to ensure the kilt remains in excellent condition.
Cool-Down and Inspection
Allow the utility kilt to cool down on a flat surface for several minutes. This helps set the fabric and keeps the creases sharp. It’s essential to inspect the kilt for any areas that may require further attention.
Look for spots or wrinkles missed during ironing. Pay special attention to the pleats and pockets. If necessary, touch up these areas with the iron on a lower setting.
Inspection Checklist:
- Check all seams and edges
- Examine for residual wrinkles
- Ensure pleats lay flat
This thorough inspection helps ensure a polished appearance before storage.
Storage Guidelines for Ironed Utility Kilts
Storing the utility kilt correctly prolongs its crisp appearance. Use a wide hanger with clips or slits designed for skirts or kilts to avoid stretching the fabric.
Storage Tips:
- Hang in a cool, dry place
- Avoid direct sunlight to prevent fading
- If folded, ensure that it does not create unnecessary creases
For optimal results consider using garment bags. It protect against dust and potential damage. By following these guidelines kilt will be ready for the next occasion.
Additional Tips and Tricks
When caring for a utility kilt, certain techniques can simplify the ironing process. Knowing quick touch-up methods and avoiding common errors can enhance the maintenance of this garment.
Quick Touch-Up Techniques
For minor wrinkles, a quick touch-up can save time and effort. A handheld steamer is effective for smoothing out small areas without needing a full ironing session. Simply hang the kilt and gently steam from a distance of about 6 inches to avoid moisture damage.
Using a damp cloth can also help. Place it over a wrinkled area and apply the iron on low heat. This method adds steam without direct contact, making it safer for delicate fabrics.
A travel iron is a handy tool for those on the go. Compact and portable, it can quickly address any wrinkles during trips, keeping the kilt looking sharp.
Avoiding Common Ironing Mistakes
One common mistake is using excessive heat. Different fabrics require specific temperature settings. Always check the care label and adjust the iron accordingly.
Another error is neglecting to iron pleats. When pressing the kilt, ensure the pleats are aligned and ironed separately. This maintains the garment’s structure and appearance.
Failing to use a pressing cloth can lead to shiny spots. This cloth serves as a barrier between the iron and fabric, preventing damage. Keeping the kilt clean and free from starch buildup also ensures optimal results during ironing.